How to Plant a Kitchen Herb Garden
From curious beginners to culinary aficionados, dipping your fingers — and your tastebuds — into gardening gives you freedom and ownership over your plate. It can also save you money, with the average home gardener cutting their grocery bills by nearly $500 a year.
Home gardening doesn’t have to mean large plots of land and a lot of work, either. One of the most popular and versatile garden types is one you can grow right at home perched on a spare windowsill: an herb garden.
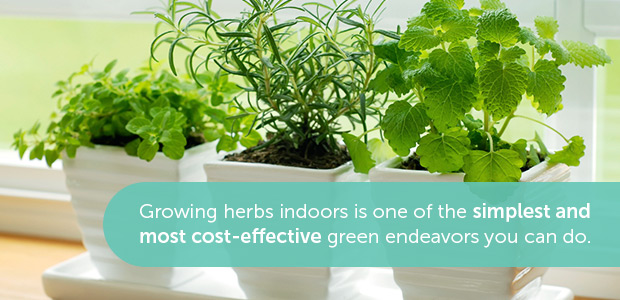
Growing herbs indoors is one of the simplest and most cost-effective green endeavors you can do. Herbs provide fresh flavor and nutrition at your fingertips — plus, it’s one less thing you have to buy at the store.
Everyone has an inner green thumb, and with a few indoor kitchen herb garden ideas, steps and tricks, you’ll be well on your way to harvesting yours.
1. Herb Selection
Indoor kitchen or windowsill herb garden ideas are vast and diverse. There are dozens of herb varieties to pick from, some simple staples and others seasonal favorites. Each will add a pop to nearly any dish you whip up.
That’s why the first decision to make when it comes to your indoor garden is determining what herbs to plant. Decide if you want easy, intermediate, or advanced level plants; here a list of herbs to help you choose!
You can’t go wrong with your selection. You can, however, do a little research and note some plant-tending tips for the most common herbs grown indoors to see what’s appealing — and conducive — for you:
- Basil. Fresh basil is a classic herb to garnish soups, sauces, pasta and bread. Its earthy, aromatic flavor can grow year-round indoors as long as it remains in sunlight most of the day. Make sure to place your basil plant on a windowsill or house area that gets an abundance of direct, natural light, ideally one that’s south-facing.
- Dill is an easy addition to any indoor garden. Since it’s an annual with a single unique taproot system, it may a require slightly larger container than other herbs — think pots 12 inches deep to allow for that main taproot growth. Dill requires a well-drained, moisture-controlled environment as well.
- Rosemary. Rosemary plants enjoy high levels of sunlight and air circulation to grow their healthiest. Place rosemary pots on south-facing windowsills to maximize the direct light they receive.
- Thyme. Thyme is a classic French spice perfect for flavoring stews, soups and meats. It is also hardy and relatively versatile as well. It is a drought-resistant herb that requires watering only when its soil is dry to the touch. Plant and place in an area that gets bright sunlight.
- Bay Leaves. The fragrant leaves of fully harvested bay plant can take a few years to cultivate from its initial seeds. Be patient if you’re growing these herbs from scratch. More mature plants deliver ample leaves that flourish in direct light away from variable temperatures — in other words, keep your bay leaves away from heat, like radiators or ducts, and cold from frosty windows.
- Parsley makes a great addition to a kitchen herb garden for its simple upkeep. The plant pairs well with many other herbs in a single container and prefers slightly above-average watering amounts. Be sure pots have ample drainage, so roots don’t get waterlogged.
- Chive plants generally grow about 10 to 12 inches tall and are a member of the onion family. They enjoy lots of light and a relatively humid environment, which can be bolstered by mistings, filled pebble trays or even other plants.
- Oregano. Given enough bright light, oregano will thrive indoors when placed in south-facing windows. It will need only light watering when the soil is dry to the touch. Plant in light, fast-draining potted soil, if possible.
- Sage is a considered a fall and winter herb, making it a particularly nice indoor garden addition during cold months when other fresh herbs might be harder to come by. Like chives, sage needs a lot of light and higher humidity levels.
- Mint can be used in dishes both savory and sweet, making it a multifaceted inclusion with your garden. Plant mint seedlings in a container that’s 12 to 14 inches deep to allow your mint plant plenty of room to grow.
2. Picking Your Indoor Herb Garden Location
Once you have the cast of your herb garden selected, you can move onto the next set of garden-growing considerations. You’ll need to plan the physical environment where your indoor herb garden ideas will come to life as well as other care and maintenance procedures and schedules like watering, fertilizing and pot rotation.
Hours of Sunlight
Depending on herb type, you will need to know the amount of sunlight recommended for each plant’s utmost health and vibrancy.
Most popular herb types are semi-arid and high-sunlight species, so they will need at least six hours of sunlight per day to thrive.

The easiest way to tailor sunlight levels is to match plant placement with household “sun spots,” the natural lighting patterns created by the windows in your home:
- South-facing windows will provide the most amount of steady sunlight for indoor herb gardens.
- East and west-facing windows will allow the second-highest amount of sunlight during their corresponding hours. For example, east windows will receive the most sunlight in the morning, while west will get light in the later afternoon and evenings.
- North-facing windows are generally not recommended for growing herbs. They tend to have sporadic and indirect light amounts, leaving it difficult for most herbs to flourish.
Rotating Herbs
Plants can naturally tilt, leaning and growing new leaves and branch offshoots in the direction of sunlight. It’s an evolutionary instinct that allows them to catch as much photosynthesis food-producing sunlight as possible.
As your indoor herb garden grows, you may start to notice these leanings and favored growths. Aim to rotate your herb’s containers once every few days to negate lopsidedness and encourage balanced growth.
Room Temperature
The temperature of the room in which you’ve placed your indoor herb garden can also have a dramatic effect on its yields — and it is often overlooked.
Similar to sunlight, temperatures will vary throughout your house depending on architectural elements like windows and roof heights, but also controlled climates like heat, air conditioning and humidifiers.
You can aim for steady and plant-conducive room environments with the following controls:
- Thermometer Readings Between 60-70 Degrees Fahrenheit. Room temperatures that dip above or below this range can have adverse effects on your herbs’ health.
- Placing Plants Near Windows, But Not Right Against the Glass. Windowpane temperatures are often much hotter or much colder than their surrounding areas. Herbs positioned too close to the panes can be negatively affected, with some plants like basil starting to wilt within a short time.
- Humidity Controls. Indoor herb gardens have the natural advantage of their plants being placed near each other along window ledges, walls or countertops. Close-proximity plants will help the surrounding air retain moisture, but so will mounted pebble trays, towel linings and small humidifiers.
3. Kitchen Herb Garden Container Selection
Selecting the right container for your indoor herb garden isn’t just about looks. The dimensions of your chosen pots, as well as its material and drainage design, directly help or hinder the very quality of your herbs.
You’ll need to consider a few container elements before arranging your indoor kitchen herb garden:
Container Materials
Clay or terracotta pots are the most popular and commercially sold container variety. Their warm sepia hues and simple design work across herb garden varieties. More importantly, they are perfect for storing plants because of their proper drainage holes and accompanying saucers.
Other common herb containers are made from plastic, ceramics or glass. Pick pots that complement your herb’s watering needs and home’s humidity levels. Materials like ceramic and glass retain water for longer, while clay and terracotta allow water to drain more quickly.
Drainage
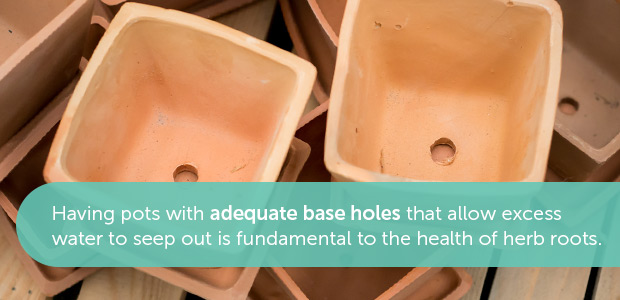
Proper water drainage is the bane of many potted plants and gardens, indoors and out. For indoor herb gardens especially, having pots with adequate base holes that allow excess water to seep out is fundamental to the health of herb roots. These small plants don’t like to be saturated — and will be damaged if they repeatedly are.
Aside from proper drainage holes at the base of a container, consider other drainage optimizers:
- Towel linings. Before adding soil to your pot, line its perimeter with a cotton flour sack towel. This trick adds a natural barrier protecting the herbs from waterlogging, as well as more tempered water release. You end up with herbs that hold moisture better but don’t flood their root system.
- Add pebbles. Place a handful of small stones at the base of your container, after a flour sack towel but before the soil and plants. This further buffers the flour sack lining and keeps the roots at a safer water level.
Potting Mix and Soil
Most indoor herbs benefit from being planted in potting mixes. These are specially blended for their contained environments and will typically be free of unnecessary fertilizers or commercial-grade chemicals in other soil blends.
Opt for lighter, fluffier potting mixes. These reduce the chance of soil compaction and root systems getting choked out due to lack of growing space. Avoid blends that have added pesticides, too, as those won’t be necessary inside your home.
Plant Acclimation
Allow time for settling, or the early stages of your potted plant development. Some herb varieties, like bay leaves, can take a few years to reach full harvest maturity. Research proper transplanting and acclimation techniques for each herb, then routinely follow all water, light, humidity and rotating recommendations.
4. Indoor Herb Garden Care and Maintenance
Once your indoor herb garden has been planted — its seeds picked, its containers set, its soil and locations all determined — you’ve graduated onto the next green thumb stage: caring for the growth and harvest of your herbs.
Luckily, care and maintenance best-practices are as intuitive as they are easily adoptable. For correct watering and overall maintenance, consider the following:
- Controlled Watering Schedule. Ensure your plants receive the proper amount of water. Too much watering, and you’ll flood its root system. Too little, and leaves and stems wilt. Research each herb’s water amount in inches, along with its accompanying schedule. Then stick to it.
- Label Herbs for Easy Identification. Add labels on the sides or bottoms of all garden pots that state their watering levels, schedule and rotation amount, plus any extra maintenance needs.
- Don’t Forget to Mist. Wipe herb leaves with dampened flour sack towels to remove dust and excess dirt. This helps to keep herbs fresh while also cooling their leaves and stalks.
For harvesting, keep in mind these tips:
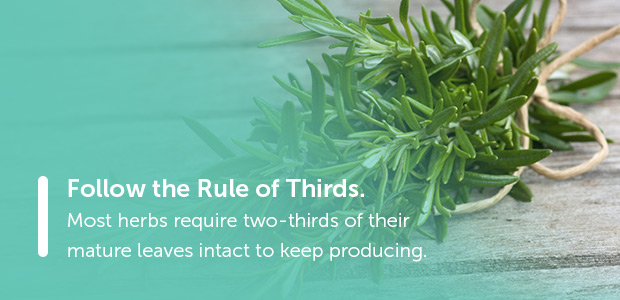
- Follow the Rule of Thirds. Most herbs require two-thirds of their mature leaves intact to keep producing. This means when you go to harvest fresh herbs, take care to only pluck a third of the plant.
- Let Them Grow Back. To keep your plant healthy and producing, you’ll want to let that one third you harvested grow back before you cut more.
- Use Tools to Cut and Clip. Avoid the temptation of quickly pulling herbs by hand. Instead, use a small pair of scissors or plant clippers to neatly trim along stems or leaf bases. Take care not to clip too close to stems, as this will leave behind knubs most herbs will have a hard time regrowing in-full. Only pull by hand when the herb is a leafy perennial that is harvested from the sprig up.
- Know Your Preserving Method. From hang-drying bundles to food dehydrators and adding fresh herbs to oil and butter, know ahead of time how you wish to preserve your harvest. You don’t want to leave recently clipped herbs sitting around. The longer you wait to dry your herbs properly, the less aromatic and flavorful they will be.
5. Drying and Preserving Herb Harvests
The secret to preserving herbs lies in the science of dehydration. Drying and storing herbs means you have bold, fragrant flavors you can add to any dish. Herb flavor compounds become more concentrated as they dry, and people have developed multiple herb-drying processes to unlock their aromatic delights, such as:
- Towel-and-heat drying, in the oven or microwave.
- Bundle drying.
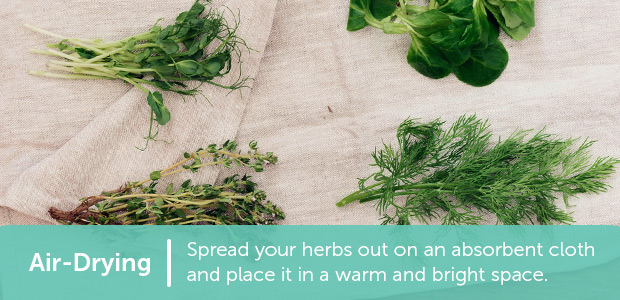
- Air-drying — spread your herbs out on an absorbent cloth and place it in a warm and bright space.
- Dehydrating with a food dehydrator.
- Adding to butter and oil.
- Adding to vinegar.
- Freeze-drying, in freezer bags, water trays or wax paper wraps.
- Salt curing.
- Sugar curing.
Whether you use them fresh or dried and preserved, herbs are a staple in kitchens worldwide. They signify the crowning achievement of your cultivated indoor herb garden.
Household Towels Reimagined: For Herb Gardens and Beyond
Flour sack towels simplify a surprising number of kitchen and home activities — like growing and drying herbs, lining planters and dusting off the leaves of your indoor plants. Order your supply of flour sack towels now, and see how Cotton Creations can help you take your home’s towel uses to the next level.
You Might Also Enjoy
- Part 1: Guide to Seasonal Fruits and Vegetables
- Part 2: Summer Seasonal Produce Guide
- Part 3: Fall Fruits and Vegetables by Region
- Part 4: Winter Seasonal Produce Guide
SHARE THIS:

